Dockerfile Basics
What Is a Dockerfile?
A Dockerfile is a plain text file that lists step-by-step instructions for building a Docker image — think of it as a recipe your app follows every time you build. Docker reads it top to bottom; each instruction typically creates a new image layer that gets cached for faster rebuilds.
Dockerfile vs Docker Image
The Dockerfile is the blueprint; the Docker image is the finished product built from that blueprint. You write the Dockerfile once, run docker build, and Docker produces a reusable image you can run as many containers as you need.
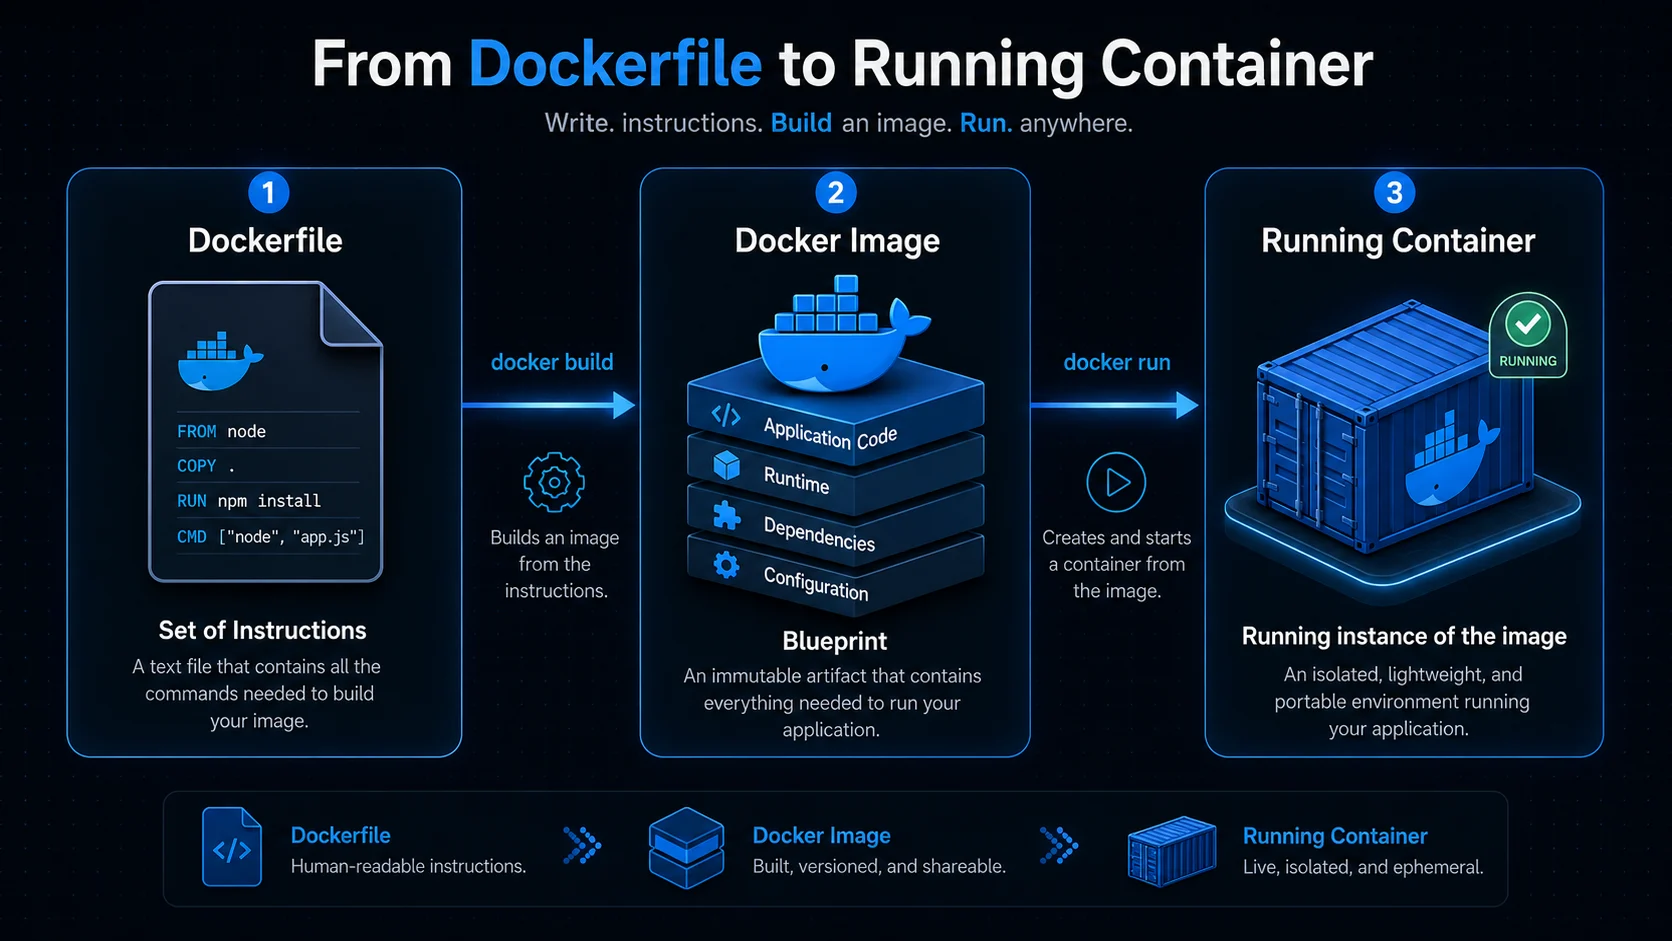
A Simple Node.js Dockerfile
Here is a realistic Dockerfile for a small Express API — notice how dependency files are copied before source code so Docker can cache the npm ci layer:
FROM node:22-alpine
WORKDIR /app
COPY package.json package-lock.json ./
RUN npm ci --omit=dev
COPY . .
ENV NODE_ENV=production
EXPOSE 3000
CMD ["node", "server.js"]
All 15 Dockerfile Instructions
Every instruction below is something you will encounter in real Dockerfiles. Each entry covers what it does, a minimal example, and a practical note.
| # | Instruction | What it does | Example | Practical note |
|---|---|---|---|---|
| 1 | FROM | Starts the image; downloads the base if not available locally | FROM ubuntu:22.04 | Required — every Dockerfile must begin with FROM |
| 2 | LABEL | Adds metadata (author, version, project, description) | LABEL maintainer="you@example.com" | Useful for documentation and image management tools |
| 3 | ARG | Build-time variable — available only during docker build | ARG VERSION=1.0 | Override with docker build --build-arg VERSION=2.0 . |
| 4 | ENV | Sets environment variables for build and runtime | ENV APP_ENV=production | Your app reads these via process.env or equivalent |
| 5 | WORKDIR | Sets the working directory; creates it if missing | WORKDIR /app | All following commands execute from this path |
| 6 | COPY | Copies local files into the image | COPY app.py /app/ | Default choice — simple, predictable, no remote URLs |
| 7 | ADD | Like COPY, plus auto-extracts tar archives and fetches URLs | ADD app.tar.gz /app/ | Prefer COPY unless you need extraction or a remote file |
| 8 | RUN | Executes a command during the build; creates a new layer | RUN apt-get update && apt-get install -y nginx | Use for installing packages, compiling, or any setup step |
| 9 | EXPOSE | Documents which port the app listens on | EXPOSE 8080 | Does not publish the port — you still need docker run -p 8080:8080 |
| 10 | VOLUME | Declares a mount point for persistent data | VOLUME /data | Data here survives container recreation — good for DBs, logs, uploads |
| 11 | USER | Runs subsequent commands as a non-root user | USER appuser | Improves security — avoid running as root in production |
| 12 | HEALTHCHECK | Defines how Docker checks if the app is healthy | HEALTHCHECK CMD curl --fail http://localhost:8080 || exit 1 | Docker reports: starting → healthy or unhealthy |
| 13 | CMD | Default command when a container starts | CMD ["python", "app.py"] | Fully overridable — docker run image-name bash replaces it |
| 14 | ENTRYPOINT | Defines the main executable; args are appended, not replaced | ENTRYPOINT ["python"] | See CMD vs ENTRYPOINT below |
| 15 | ONBUILD | Runs when this image is used as a base in another Dockerfile | ONBUILD COPY . /app | Useful for reusable base images that child images extend |
Instruction Deep Dives
FROM, LABEL, and ARG — Starting the Build
FROM is non-negotiable — it tells Docker which base image to extend. Pin a specific version (node:22-alpine) instead of latest so rebuilds stay predictable.
LABEL is optional but helpful for tagging who maintains the image, what version it represents, or what project it belongs to.
ARG variables exist only at build time. They are ideal for passing a version number or build flag into RUN commands, but they do not persist when the container runs. Use ENV if the value needs to survive into runtime.
COPY vs ADD — When to Use Which
Both copy files into the image, but they are not interchangeable:
- COPY — copies files and directories from your build context. No surprises. Use this by default.
- ADD — can auto-extract a local
.tar.gzinto the destination and download files from a URL. The extra behaviour can be unexpected, which is why most teams reach forCOPYfirst and only switch toADDwhen extraction or remote download is genuinely needed.
RUN — Building Layers
Every RUN instruction creates a permanent layer in the image. Chain commands with && in a single RUN to keep layer count down:
RUN apt-get update && apt-get install -y nginx && rm -rf /var/lib/apt/lists/*That one line installs nginx and cleans up in a single layer instead of three.
EXPOSE and VOLUME — Runtime Hints
EXPOSE is documentation, not magic. It tells humans and tools which port your app uses, but nothing is reachable from outside the container until you publish it:
docker run -p 8080:8080 my-imageVOLUME marks a path as persistent storage managed by Docker. If a database writes to /data and that path is a volume, stopping and recreating the container keeps the data intact.
CMD vs ENTRYPOINT — How Containers Start
These two instructions work together and are the most commonly confused pair in Dockerfiles.
CMD alone — sets the default command. Fully replaceable at run time:
CMD ["python", "app.py"]docker run myapp bash # runs bash instead of python app.pyENTRYPOINT + CMD — ENTRYPOINT locks in the executable; CMD supplies default arguments that docker run args override:
ENTRYPOINT ["python"]
CMD ["app.py"]
docker run myapp # runs: python app.py
docker run myapp test.py # runs: python test.pyUse ENTRYPOINT when the container should always run the same binary (a CLI tool, a server process). Use CMD alone when you want flexibility to override the entire command at run time.
HEALTHCHECK — Knowing When Apps Fail
A healthcheck gives Docker a way to detect a running but broken app — one that started successfully but stopped responding:
HEALTHCHECK CMD curl --fail http://localhost:8080 || exit 1Docker cycles through three states: starting (waiting for first check), healthy (check passed), and unhealthy (check failed). Orchestrators like Compose and Kubernetes use this to restart or reroute traffic away from failing containers.
ONBUILD — Base Images That Trigger on Extend
ONBUILD instructions do not run when you build the base image. They run when someone else uses your image as their FROM:
# In a base image Dockerfile:
ONBUILD COPY . /app
This pattern is common in language base images that expect the child Dockerfile to supply the application code.
Quick Reference
| Instruction | Purpose | Instruction | Purpose |
|---|---|---|---|
| FROM | Base image | EXPOSE | Document application port |
| LABEL | Metadata | VOLUME | Persistent storage |
| ENV | Environment variables | USER | Run as non-root user |
| WORKDIR | Working directory | HEALTHCHECK | Check container health |
| COPY | Copy local files | CMD | Default startup command |
| ADD | Copy + extract archives | ENTRYPOINT | Main executable |
| RUN | Execute build commands | ARG | Build-time variable |
| ONBUILD | Trigger for child images |
Best Practices
- Use a minimal base image — Alpine, Debian-slim, or distroless keep images small and reduce attack surface.
- Combine multiple
RUNcommands with&&in a single instruction to reduce layer count. - Add a
.dockerignorefile to excludenode_modules,.git, and other files that bloat the build context. - Prefer COPY over ADD unless you specifically need archive extraction or a remote URL.
- Run containers as a non-root USER whenever possible.
- Pin image versions —
python:3.12-sliminstead oflatest— so builds stay reproducible across machines and CI. - Place frequently changing instructions (like
COPY . .) near the end of the Dockerfile to maximise build cache hits. - Use multi-stage builds to keep compilers and build tools out of your production image.
- Add a HEALTHCHECK for production workloads so Docker can detect and report failing apps.
- Scan your Dockerfile for best-practice violations, and never hard-code secrets — pass them at run time via environment variables or a secrets manager.
Key Takeaway A Dockerfile is a layered recipe read top to bottom: FROM picks your base, COPY and RUN assemble the app, EXPOSE and ENV document runtime config, and CMD or ENTRYPOINT start the process. Know all 15 instructions, understand when to use each, and follow the best practices to build images that are small, secure, and fast to rebuild.